Tuesday, September 19, 2017

Fall Flavor: Healthy Crockpot Chili


As the leaves begin change, the days get shorter, and we settle into our back to school routines, our lives definitely get busier.  It's nice to come home to the comforting smell of a dinner already prepared and waiting for you.  And chili is one of those rare comfort foods that is actually good for you!  Here is a super simple and yummy version that I love to make.  This is a lightly spicy version that is good for both kids and adults.  For a little more kick add a couple more jalapenos!

Chili Recipe

Ingredients
1 tablespoon olive oil
1 ½ pounds ground turkey
1 onion, chopped
1 green bell pepper, chopped
1 jalapeno, seeded and diced
2 tablespoons minced garlic
1 (25 oz) can black beans*
1 (25 oz) can pinto beans*
1 (25 oz) can kidney beans*
1 (28 oz) can fire roasted diced tomatoes*
1 (15 oz) can tomato sauce*
1 (15 oz) can fire roasted diced tomatoes with medium green chilies*
4+ tablespoons chili powder
1 teaspoon oregano
Dash of cumin
Salt to taste

*I like to buy low sodium beans and tomatoes when possible.  Then I can add back in the high quality sea salt to taste.  It gives me more control, and I like to eat low sodium for an anti-inflammatory diet.

Fresh ingredients in the pot ready to slow cook!
Directions
  1. Heat the olive oil in a heavy skillet on medium high heat.  Cook the turkey meat.
  2. While the turkey is cooking, dice the vegetables and add to the slow cooker.  Drain and rinse the beans, then add to the slow cooker.  Add the tomatoes and spices to the slow cooker.  Add the meat and stir to combine.
  3. Cook for 4 hours on high.  Serve with tortillas or rice, a sprinkling of grated cheese and chopped green onions, or however you like your chili! 


    Enjoy!

Tuesday, September 5, 2017

How to remove stains from your precious Blythe doll


Oh no!  Your doll has a stain!


A word about prevention…

Unsightly and upsetting stains can be caused by shoes, tights, fabrics, even bias tape used on garments to finish the edges of armholes, necklines and hems, etc.  First and foremost is protecting your precious girl from the stains in the first place.  She can wear tights and even protective undergarments like those offered by CoolCat here.  
netunder.jpg

Many fabrics can leave stains on a doll.  Red, black, and indigo blue are the main colors that have problems with color fastness.  So you could just stay away from those colors.  I always line my dresses with white batiste to protect dolls. Additionally before sewing, I wash fabrics in warm water with a mild detergent to check for color fastness.  

Some people will wash in Synthrapol to help pull out any excess dye and prevent the molecules from reattaching to fabric fibers.  This kind of a wash is particularly important when you are dyeing, using chemical dyes or batik. 


However, even commercially produced fabrics from stores such as JoAnn can have dye run off or bleeding. If the dye does run, I use Rit Dye Fixative or Retayne.  Both are good fixatives and are readily available on Amazon. A chemical dye set is best, especially for a chemical dye.  After a half hour soak in very hot water and a fixative, rinse well and do another wash.  Usually the bleeding is solved, but if the fabric still runs, then I count it as a loss and throw it away.  Also, I never make tights out of any fabric that has any problem with color fastness from the get go.  


But my doll already has a stain...


 What can you do?!

The good news is-- it's fairly simple to remove stains from Blythe's legs and feet.  This will also work on some arm stains, but it does take longer.  

For facial stains, I would try another method that I won't go into here.  That can be complex.  It depends on whether she is customized or not and what the surface of her skin is like, shiny or matte.  Also, you don't want to remove her makeup.  So there are a lot of variables with face and head stains.  It’s more complex.

Right, so now we are going to talk about legs stains.  Often boots or tights are the culprits.  Like these lovely boots.  


Awesome boots by BHC.  But evil...
See how badly stained my girl's feet are?


 They stained my girl's feet nearly black.  And in the picture above, she already has her first coat of cream applied!
Eek!  There's a spot on her arm too!

 And black lace tights stained another doll's legs!  Actually, right now she is a clothing model sans head, so it's not really a big deal.  But it is a real Takara body, so I might as well keep it in decent condition.


You use this stuff.  It is pimple cream from the drug store.  I got this at CVS.  Look for some extra strength with 10% Benzoyl Peroxide.  


Smear a good coat on.  After applying a good thick coat of the cream, I wrap her in plastic wrap to keep the product active.  (If it dries out then you have to rinse or wipe with a wet washcloth and recoat.  Make sure that you wipe with a white washcloth or one that you don't care about, because this stuff is bleach, so it will mark your washcloths.)  Now set her in a window or indirect sunlight to speed up the process.  You can put a small towel or washcloth (another clean one!) over her face to protect it from the sun if you are worried about yellowing.  I left her there for about 2 weeks, and I re-applied 2 to 3 times.
Doll 1: just the feet

Doll 2: stage1
2nd application

Here are my results!   I even treated a spot on her arm that responded fairly well.

Doll 2: most of the stains from the tights are gone!
Doll 2: Arm stain significantly faded!


 The model doll (Doll 2) is so much better!  I could apply another treatment to resolve the lingering stain or just wait it out.  I think that the rest of the stains will resolve on their own at this point.


And my little vamp with the black feet?  She is relaxing, knowing that her stains are nearly gone as well.


So before you panic, apply that pimple cream, then reapply and give it some time.  Also, I find that light staining can tend to resolve itself over time.  Put some heavier white cotton tights on your girl and forget about it for awhile, a long while, and they may just resolve on their own, and at the very least you won’t see them.

Happy Blything!

Saturday, August 5, 2017

BlytheCon Brooklyn Skirt Directions

BlytheCon Brooklyn Skirt Instructions

Materials:
Swatch of fabric, 4” by 7”
Thread
3 ½ “ piece of 1/8 “ wide elastic
1” piece of 1/8” wide leather
Small buckle or button


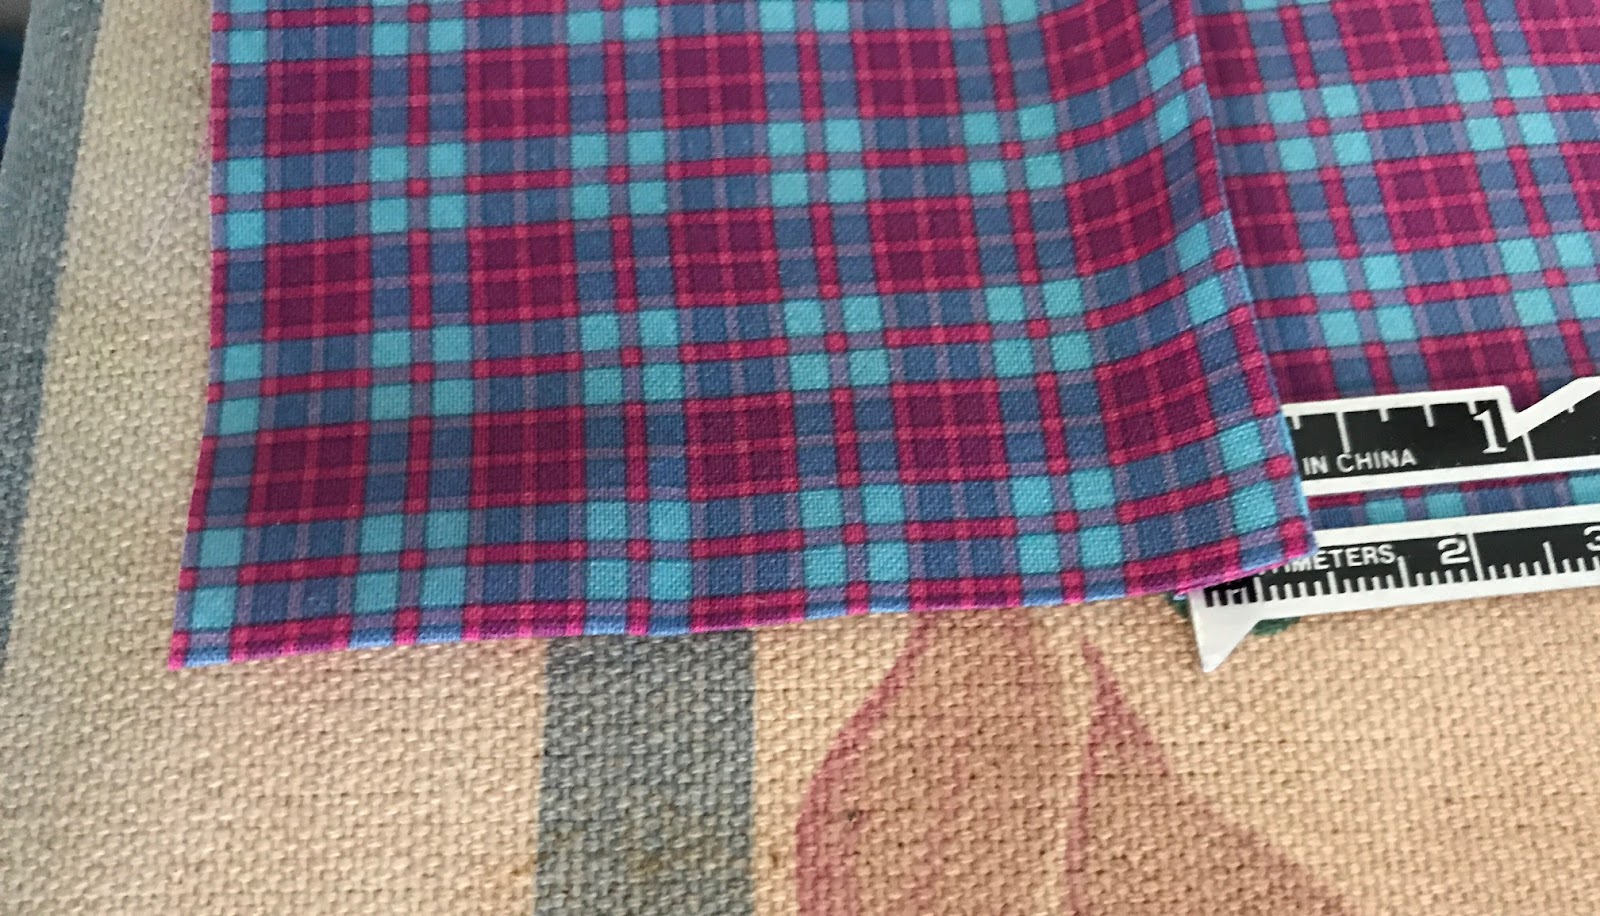
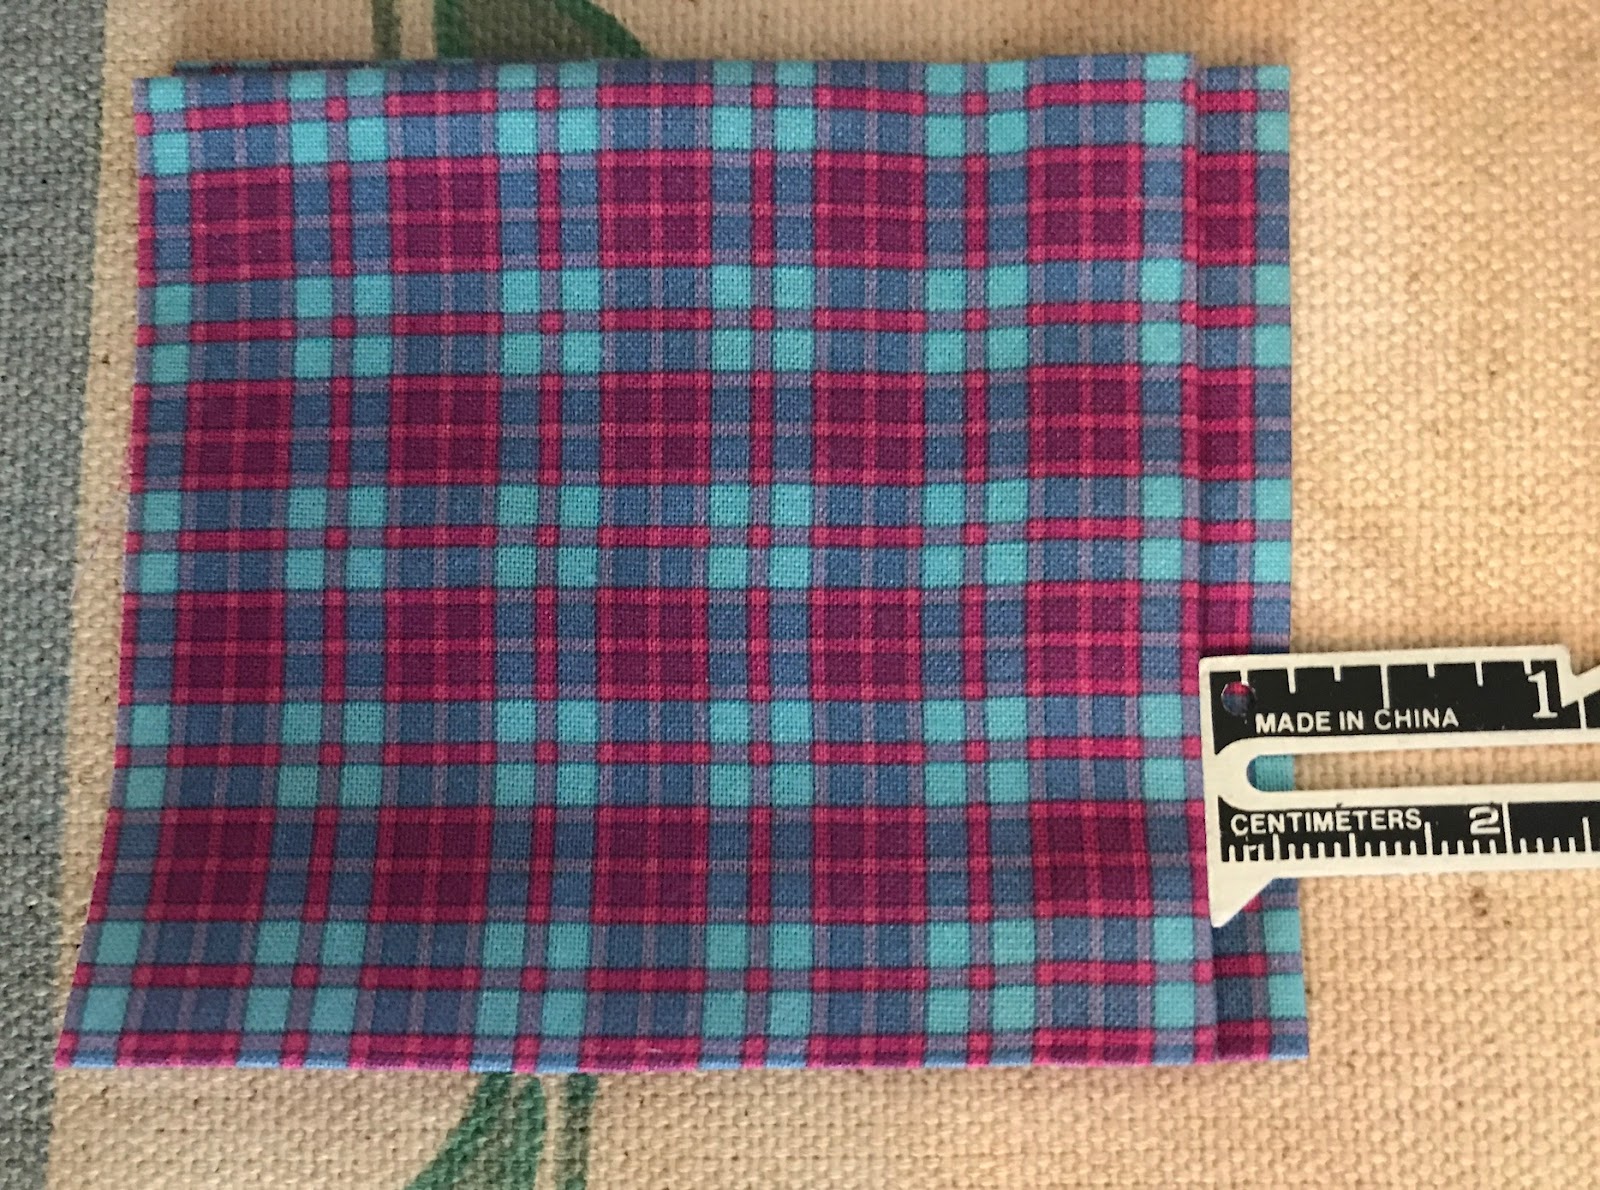
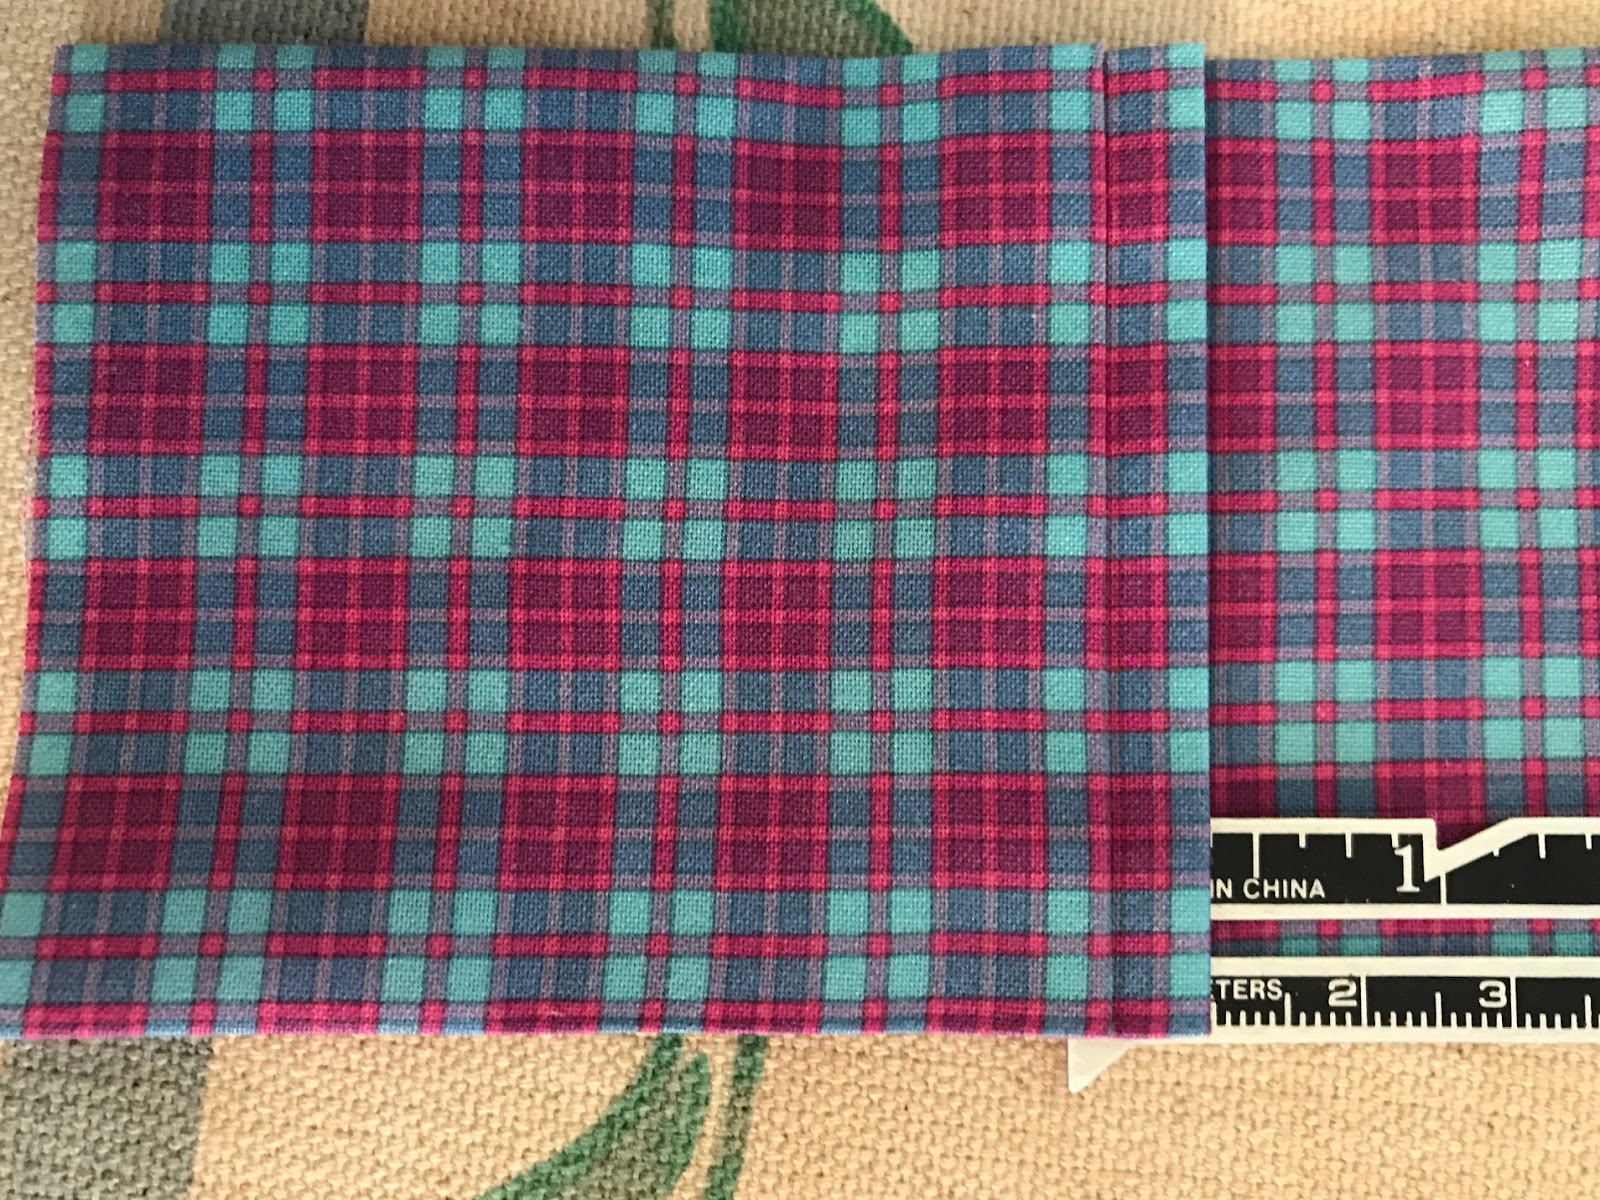
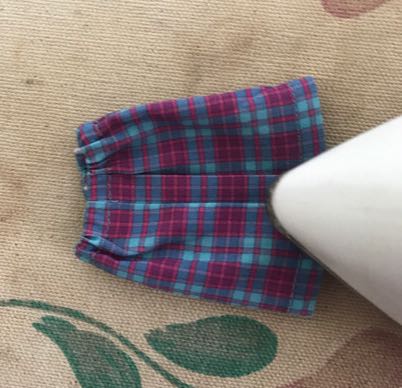
I am making the donation skirts out of the BCBk plaid.  If you are attending, then you don’t need to make one out of that.  But if you are not, and you want an exact replica, then fabric is available here.  https://www.spoonflower.com/fabric/5883578-plaid-small-by-blythecon_brooklyn    I got the Plaid Small in Basic Cotton Ultra.  And a swatch is enough for this skirt!  But I think that this skirt will be cute in lots of different designs, so get creative!

The leather is widely available at craft stores like Michael’s, look in the leather and beading sections.  It is the flat 1/8 inch wide leather strapping.

If you want to wait for the slow boat from China, the buckles are available most affordably on eBay and Mimiwoo.  www.mimiwoo.com/index.php?route=product/product&product_id=1625&search=+buckle  
But they are also available from a US seller https://www.etsy.com/listing/269758292/b006i-gold-mini-buckles-sewing-craft?ref=hp_rf  However, I think that there is room for creativity on this.  You could use a ribbon and a button or two.  Or you could do an embroidery chain stitch.  Even just put a pretty mini applique there.

All garments benefit from good pressing, but pressing is particularly important in this pattern.  So get out that trusty iron!

  1. Preliminary Pressing
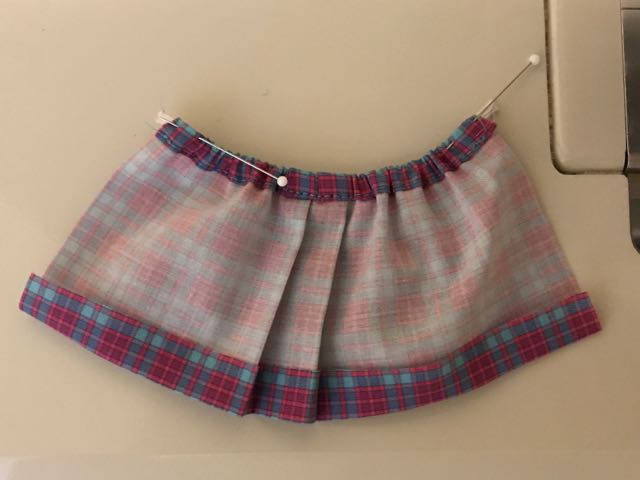
The pattern is really just a rectangle and you don’t need to mark anything.  Before you sew press under ½ inch on both long edges.  
IMG_9305.jpg


Next: press in the pleats.  

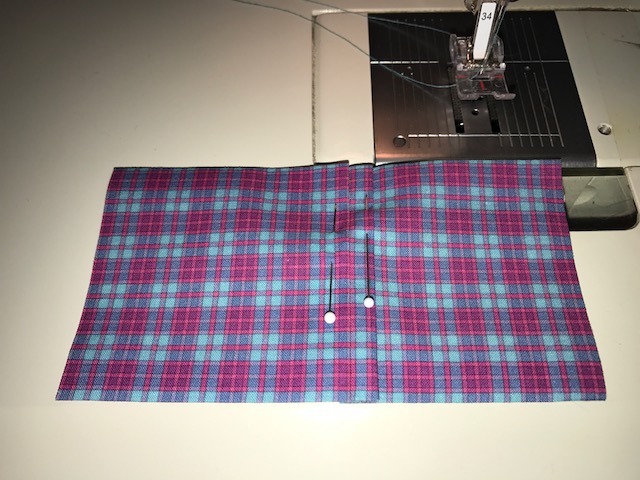
There are 2 pleats.  The first one is 2 ⅞” from the left side.  Fold and press here.
FullSizeRender-1.jpg

The pleats are ⅜” deep, so my next press looks like this.
FullSizeRender-3.jpg

There is ¼” between the pleats.  So I measure out ¼” from the last pleat edge, then fold under and press.  
FullSizeRender-2.jpg

Then I fold under the final pleat with a depth of ⅜” again and do the final press.
FullSizeRender.jpg

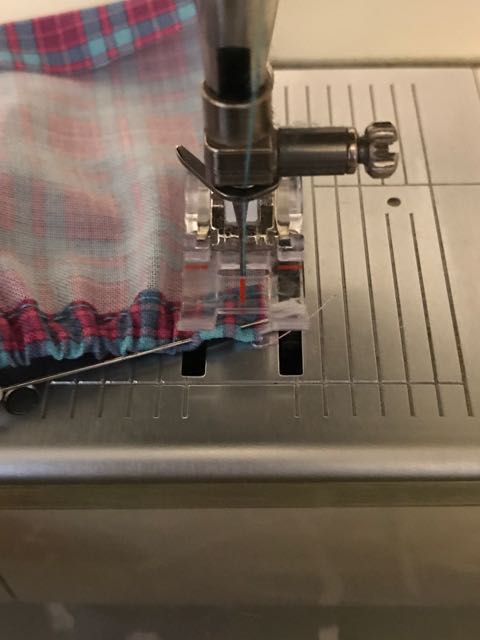
  1. Make the Waistband Elastic Casing
This can be a bit confusing, so I’ll try to break it down step by step.  At this point you can’t just fold under the casing.  One, because the pleats are in the way, and two, because the elastic would not fit through.  

So this is your pressed piece ready to go.
IMG_9906.JPG

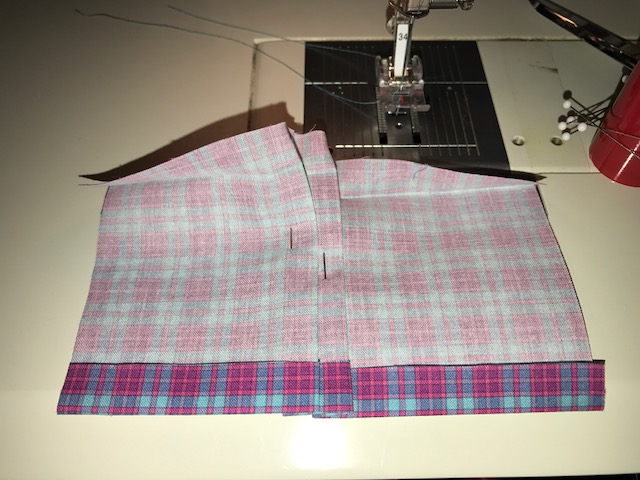
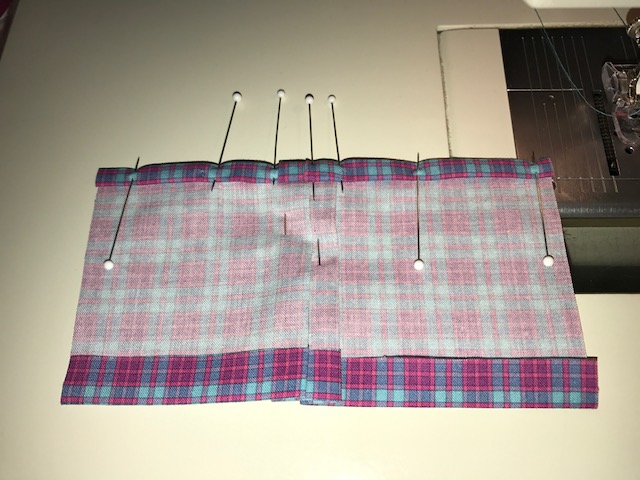
To make the casing, you need to open out the top folds and get the top flat, so that when you fold it under you can insert the elastic. First, adjust and pin your pleats in place on the front to keep the bottom edge tidy.
IMG_9915.JPG

Now, flip it over and looking at it from the back side, it looks like this:
FullSizeRender-1.jpg

Fold open the top edge, while keeping the pleats in place.
IMG_9921.JPG

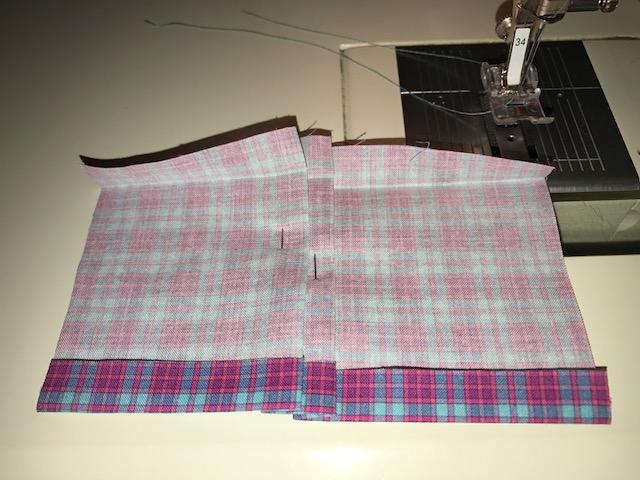
When you fold it up, the creases from the pressing are going in a different direction at the top, which makes the fabric flower out.  So I just finger press them to match the rest of the crease.  Now it lies flatter.
IMG_9924.JPG

Now keeping the pleats in place, fold the top edge down not quite half way and pin in place.
IMG_9927.JPG

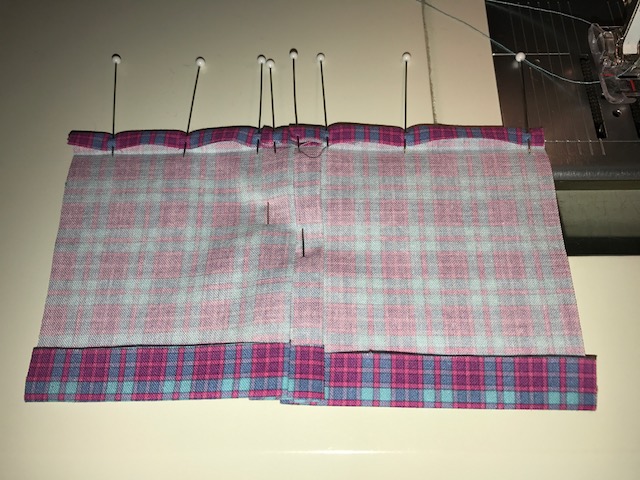
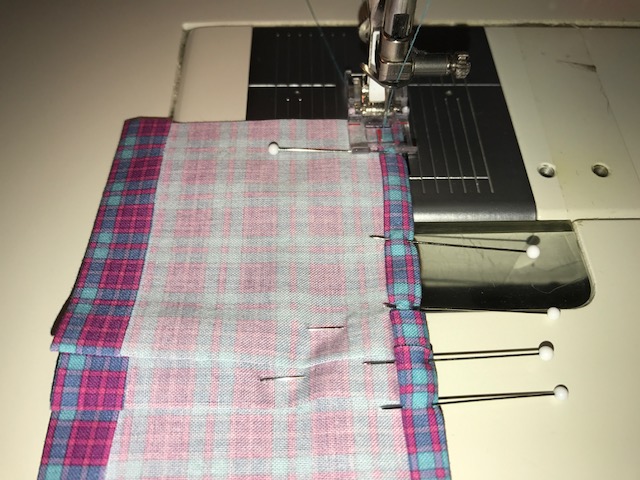
Then fold again on the original press line.
IMG_9934.JPG

And re-pin in place.
IMG_9937.JPG

Stitch close to that edge. This is your casing for the elastic.
IMG_9939.JPG

  1. Insert Elastic
I have a special tool that I use for inserting elastic in narrow casings.  You can get it on Amazon.  https://www.amazon.com/Dritz-647-Loop-Turner/dp/B005570Z9O/ref=sr_1_3?ie=UTF8&qid=1498255441&sr=8-3&keywords=tube+turner  It’s also Available at JoAnn.  But you can use a bodkin or a safety pin, if you like.
IMG_9400.jpg

Insert it in this direction so that the elastic doesn’t get caught in the folds.  Attach your elastic to the end and pull it though.  
IMG_9432.jpg

It’s a little bit fussy, so have patience.  It helps to put a pin through the end of the elastic to keep it from being pulled all the way into the casing.  Now pin the ends.
IMG_9410 (1).jpg

And stitch ⅛” from the edge to secure.
IMG_9413.jpg


You are almost done!

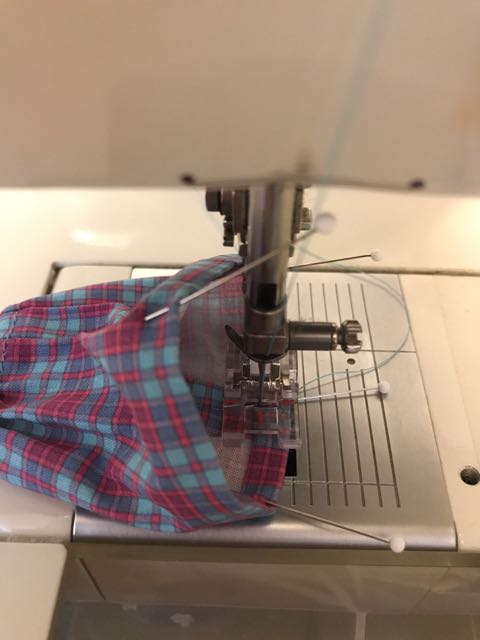
  1. Back Seam and Hemming (You have a choice here.)

1) You can run a hem along the bottom right now while the back seam is open.  That is easier.  Fold out the pressed edge straightening out the pleats, and fold under about halfway, then stitch close to the edge.  Now, right sides together, and minding your pattern if you are matching plaids, pin and stitch the back seam from waistband to hem.  Done!

Or..

2) The version described above will put a seam in your hem and lots of people do this. But I like the finished look of enclosing the seam in the hem.  So I fold the skirt right sides together and stitch from waist to hem.
IMG_9417.jpg

Now fold out the hem straightening out the pleats, fold under about halfway, and stitch close to that edge.  It’s rather fussy work.  You can see that the skirt rotates around my foot as I sew.
IMG_9424.jpg

See how pretty it looks this way?
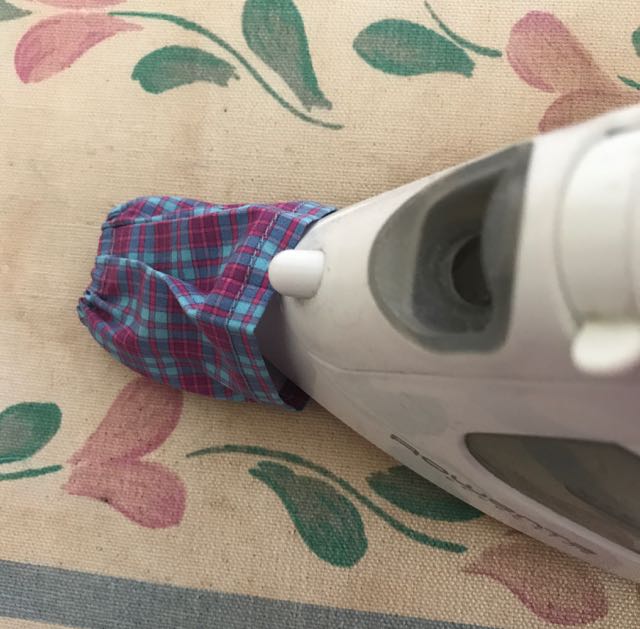
IMG_9429.jpg

  1. Final Press
Press the elastic open at the waist.  
IMG_9518 (1).jpg

Now from the bottom, press the seam flat.  
IMG_9516 (1).jpg

Now repress your pleats in place since you had to open them out for the hem.
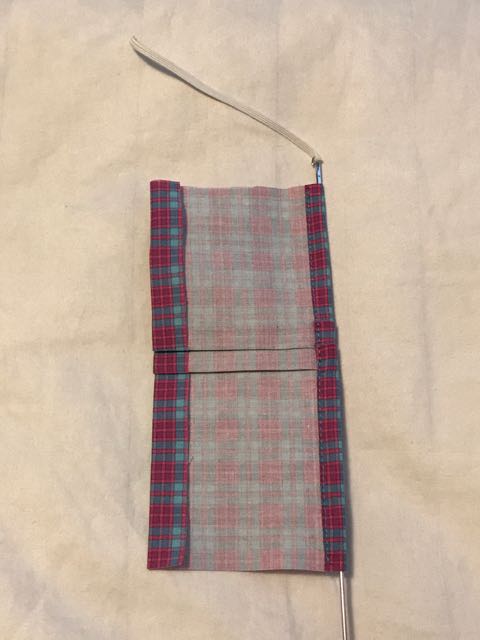
IMG_9520.jpg

  1. Embellish
Take your 1” piece of leather and shape the ends.  Position your buckle on one end.  You can make a groove in the leather for the center of the buckle to make it lie more flat.  Sew it across the pleats about ⅝” down from the top of the waistband.
IMG_9297.jpg


Done! Let’s see your skirts!  Post photos!

Friday, July 14, 2017

BlytheCon Brooklyn Donation Skirt: News, Pattern and Instructions


Donation skirt promo photo on my theme doll (tan dolls) by Chinalilly.
 
Art by Romina Galotta
I am so excited about BlytheCon in Brooklyn!  While perusing the BCBk FaceBook group, I saw that another lovely lady is making shirts, so I decided that a skirt would give everyone a complete outfit in their goodie bags.  I came up with the pattern based on the super cute BC exclusive plaid available on Spoonflower.  There are a lot of super cool options this year!


Skirts in progress!  This is not even half of my donation!


This is by far the biggest BlytheCon donation that I have ever undertaken.  I am so happy to have the enthusiastic support and sewing assistance from Jen Furman.  And Christine Kennison was so kind to provide financial support.  This help from my friends really made the project feasible.


Here's the skirt in a soft, vintage floral.  
I paired it with an angora, cream, fitted sweater.  
The pattern for the sweater is available in my shop.  


I think these skirts are super cute!  They will go with lots of tops and can work in a mix and match wardrobe.  I am providing the pattern, so that everyone can have some fun leading up to the convention.  And those who may not be able to attend can make a skirt for themselves. So let's get creative!


My Kenner wears her skirt out of the BlytheCon Seattle 
exclusive print by Dr. Blythenstein, available here.


Here's my pattern.  It's a pdf, and there is a guide on it to check for scale.  You should print it without scaling.


And here are my instructions.  It's another separate pdf.  You can download and read along or print them out, whatever works for you.


Here the skirt is paired with a sailor top and hat.  
The hat pattern is available on my blog.  Bear by Cindy Sowers.
NOTE:  I am providing this pattern to you to for personal use or to make items to sell.  And you can share the pattern far and wide.  I will keep it up here, as well.


Edit: Since a lot of people seem to be having trouble accessing the directions, I am going to put them all in another post.  Coming right up next.

I'm excited to see everyone's projects!